CONSOLE
HELP

-
Administrative Module is a useful tool for organizations/individuals with multiple divisions or sub-accounts to create several sub-accounts instantly.
-
The module facilitates the administration of each accounts, from Account set-up to Low balance triggers.
Important Note to Client
CONSOLE allows you to set up various types of sub-account charging models. They are as below:
|
Description |
Types of Account Supported |
Flat |
Flat pricing refers to the fixed price of the product and it doesn’t change whether your product quantity increases or decreases. |
Prepaid & Postpaid |
Tier |
Tier pricing refers to the discounted price that is given, when the buyer buys large quantities. |
Postpaid only |
Step |
Step Pricing refers to a price that increases/decreases to a new level with additional usage. Example: Sue uses 190 SMS package. It is sold on step pricing. Each step is priced as below: |
Prepaid & Postpaid |
Wallet |
It locks down the charging for a country without being impacted by forex rate exchange. |
Prepaid |
Group Wallet |
It groups a number of countries under 1 price rate. However the price will increase if the forex rate increases. This charging method is only applicable to multiusers. |
Prepaid & Postpaid |
Table 9-1
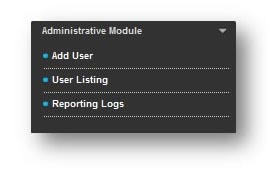
Fig 9-1

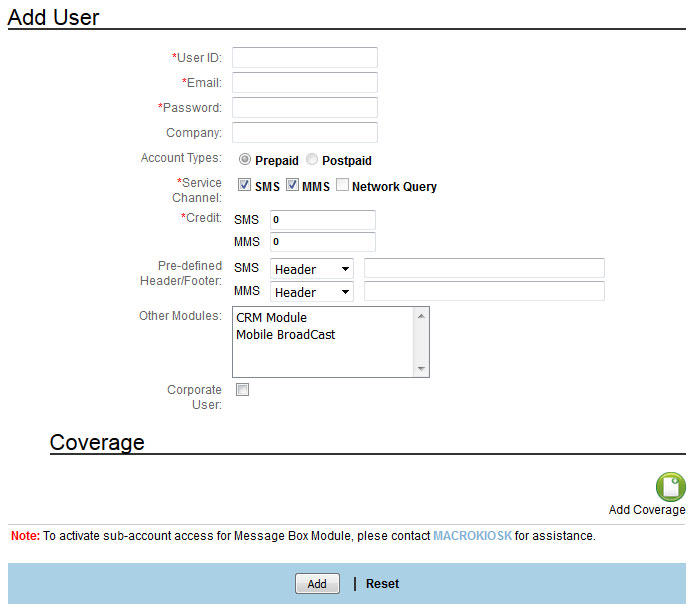
Fig 9.1-1
-
Enter the “User ID” for the new account.
- Maximum length allowed is 30 characters.
- Special characters such as *, - , +, <Space> are not allowed. Only '_',’ ;’, '@' and '.' are allowed.
-
Enter the email.
-
Then enter the "Password" for the new account.
- Password is case sensitive.
- The minimum length is 8 characters in alphanumeric format.
-
Enter the “Company” name for the account, if any.
-
Select “Account Type” for the account.
- Prepaid Admin User is not allowed to create postpaid type sub account.
- Postpaid Admin Users can create a prepaid or postpaid type sub account.
-
Enter the ‘Balance’ limit.
- This is only applicable for ‘Prepaid’ account.
- This is not applicable for SMS
-
Select "Header" / "Footer" from "SMS" drop down list.
- Type the header or footer message that you wish to display to your sub-accounts' SMS.
-
Enter "SMS Message" as preset tag line message if you intend to have sub-user account to display this fixed message along with the SMS broadcast.
For example: SMS Preset Tag Line is set as "Powered by MACROKIOSK". By default, every SMS broadcasted from the sub-users' account will display "Powered by MACROKIOSKk" as a header or footer text.
-
Select “Other Modules” accessible by sub-account (Multi-selection is allowed).
- By default, all sub accounts are assigned with Bulk SMS module access right only.
- "Other Module" is blank if Admin Module do not subscribed to any optional module.
- Sub-account access for "Message Box" Module will be activated by MACROKIOSK upon approval.
-
‘Corporate User’ checkbox: This button allows you to allocate the purchased values to different departments in the same organization. Users in this category normally don’t charge the respective departments. Therefore the price remains the same, as there is no sales taking place.Note: Even if you have set a higher Selling Price, by clicking on the ‘Corporate User’ button, the Selling Price will be set to the Cost Price.
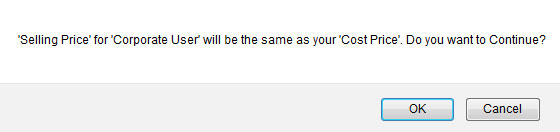
Fig 9.1-2
-
Once you have checked the ‘Corporate User’ checkbox, another checkbox called
 will be displayed. If you click this checkbox, the Corporate User Sub-Account will be able to view the Cost Price in the Reporting Module. Note: Even if you have set a higher Selling Price, by clicking on the ‘Corporate User’ button, the Selling Price will be set to the Cost Price.
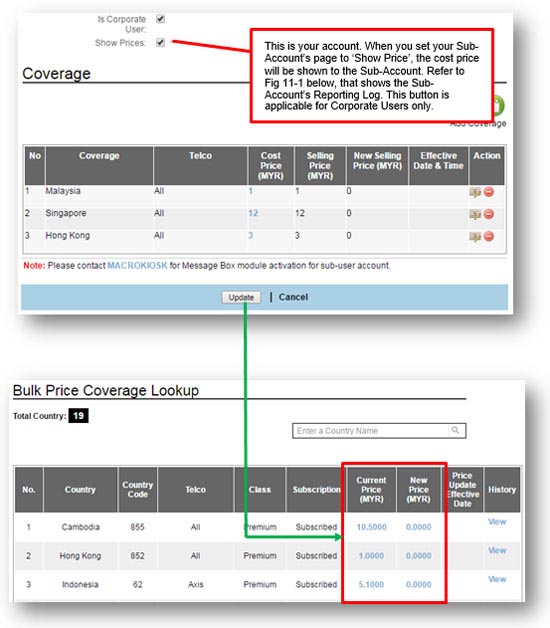
Fig 9.1-2
Notice that the ‘New Price’ shows ‘0.00’. This is because when ‘Corporate Price’ is checked, the system will automatically use the cost price, since no sales is taking place, when usage is distributed to other divisions in the organization.
If it is NOT checked, Fig 9.1-3 will be displayed. This way the corporate user can refrain from disclosing the prices to other departments.
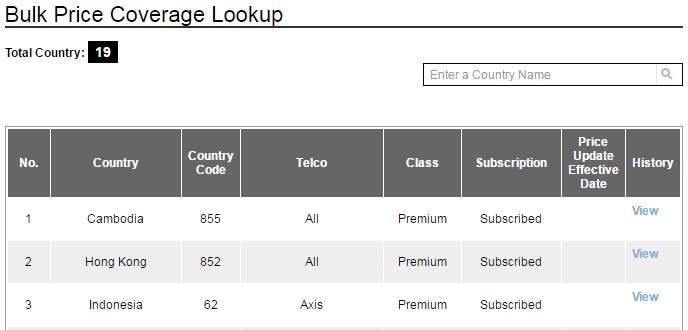
Fig 9.1-3
This section allows you to:
- Top-up the selling price to your Sub-account or let it remain the same.
- Add country coverage for your Sub-accounts.
- Step 1 : Click on
- Step 2 : The following will be displayed:
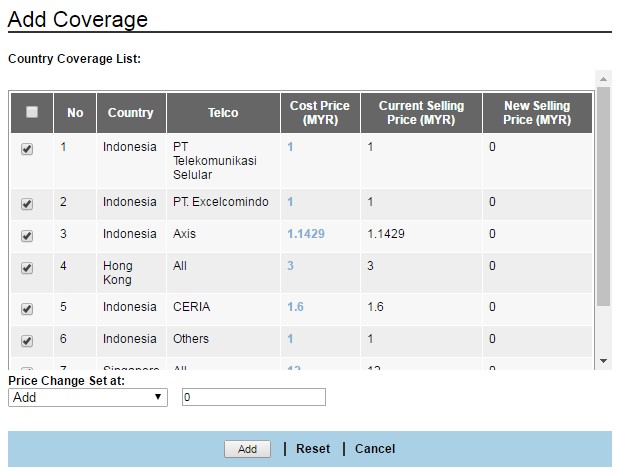 Fig 9.2-1
- Step 3 : Select the country coverage. Tick on the check box
 .
.
Note: By default, only the Master account’s country coverage will be displayed to the Sub-Accounts for selection.
Fields
Description
Price change set at ‘Add’
This is the amount that will be added to the ‘Cost Price’.
Example: if you key in ‘3’, the selling price displayed will be ‘6’.Price change set at ‘Deduct’
This is the amount that will be deducted from the ‘Cost Price’.
Price change set at ‘Add By %’
You can add by a percentage for a single country or a group of countries by checking the respective checkbox.
Price change set at ‘Deduct by %’
You can deduct by a percentage for a single country or a group of countries by checking the respective checkbox.
Add
Once you have keyed in the amount. Then click ‘Add’
Reset
If you want to change the figures, click ‘Reset’.
Cancel
This button will close the existing window.
Fig 9.2-2 will be displayed.
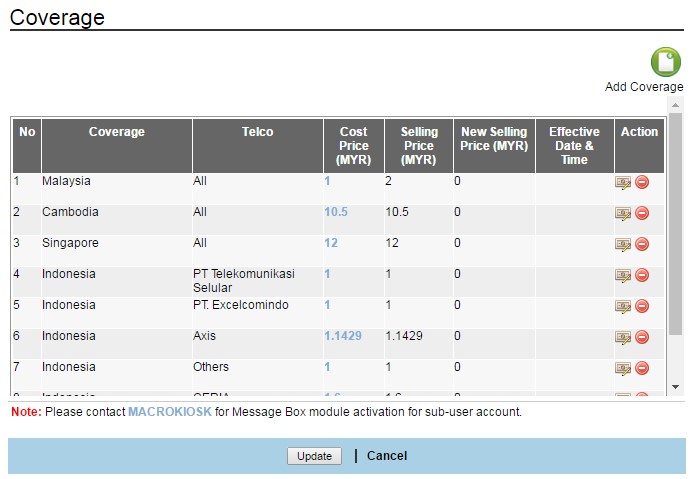 Fig 9.2-2
- Step 4 : Once completed, click ‘Update’.
- Step 1 : Click on
- Select the Sub-Account from the User Listing.
- Go to the ‘Coverage’ section as shown in Fig 7.3-1. Select the Edit
 button.

Fig 9.3-1
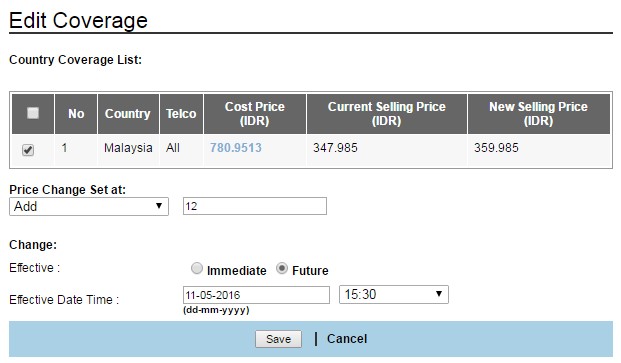
Fig 9.3-2
- Select ‘Add’ and key in the amount. If the changes should take place in the future, add the date and time. Click ‘Save’ and you will be brought into the ‘Coverage’ page.
- From here, click ‘Update’. The same goes for deduction.
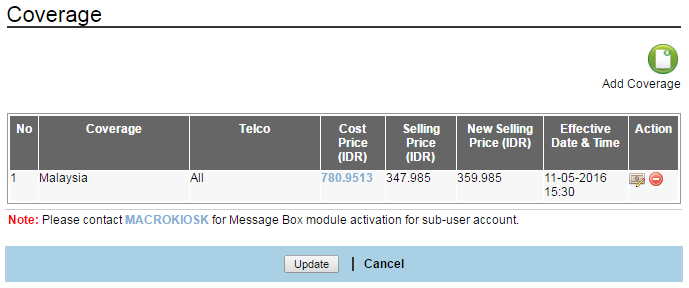
Fig 9.3-3
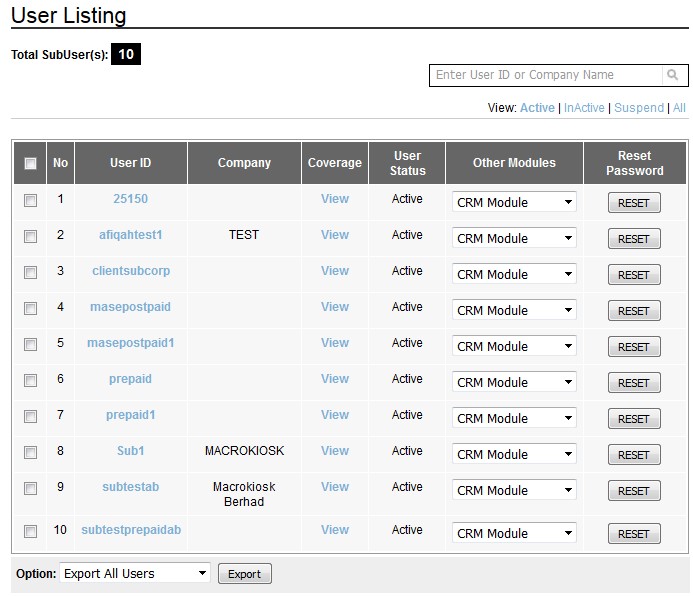
Fig 9.4-1
9.4.1 Search
-
Key in User ID or Company name in the search field to search for sub-user account information.
-
Accepted input: Roman / Unicode / Thai characters
9.4.2 Reset Password
- Double click on the ‘User ID’ to edit the details of the user account.
- If the user would like to reset the password, click on the ‘Reset’ button located under the ‘Password’ column.
- A confirmation message will be prompted as below:
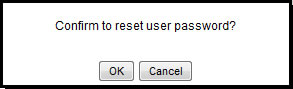
Fig 9.4.2-1 - When user clicks on ‘OK’ the users password will be automatically generated by the system and emailed to them. After this, the user can change the password to their own preference.
9.4.3 Edit
-
Click on the selected ‘User ID’ to edit their details.
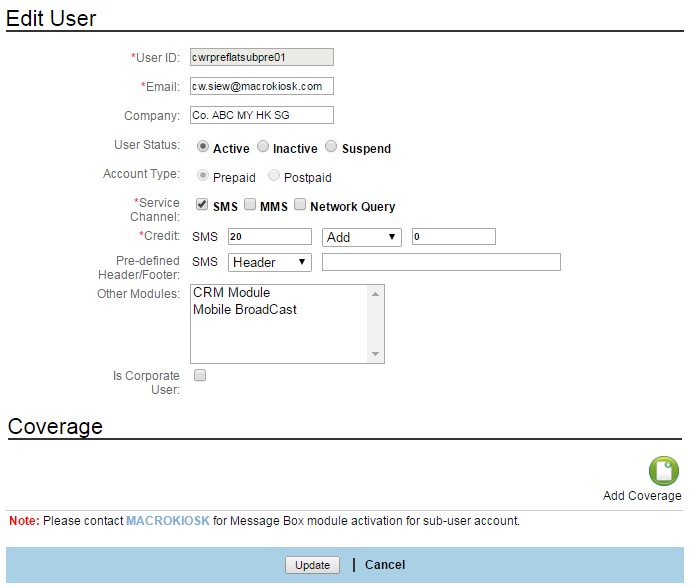
Fig 9.4.3-1
-
Edit the setting for the respective fields.
-
Click "Update" to save the new setting, or click "Cancel" to abort the action.
-
Please ensure that you have selected "Coverage"
Field |
Description |
User ID |
|
|
|
Company |
|
User Status |
|
Account Type |
|
Service |
|
Balance/Amount |
|
Pre-defined Header/Footer |
|
Other Module |
|
Table 9.4.3-1
9.4.4 Export
-
Select “Export All Users" to export the entire user account records into excel (.xls) file.
-
Select "Export Selected Users" to export the selected user account record into excel (.xls) file.
-
‘Reporting Logs’ under ‘Administrator Module’ is to view the sub account’s reporting logs. Your account (Master User’s) transaction details won’t be shown here. To view your transaction details, you have to view them under ‘Reporting Logs’ of the ‘Reporting Module’.
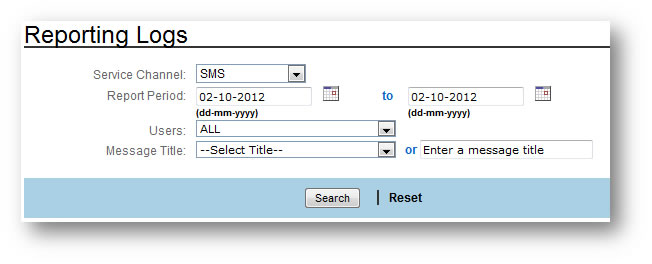
Fig 9.5-1
9.5.1 Search
-
Enter the reporting date range, such as Start date and End date.
-
Select “Users” from the drop down list.
-
Select the “Message title” from the drop down list,or enter a keyword.
-
Click "Search", or click “Reset” to clear the input/setting on the current page and the “Total Reporting Logs” is displayed. Click the arrow button
 to display the breakdown of this ‘Total Reporting Log’.
-
Click on the ‘User ID’ to view the ‘Message Content’ and ‘Message Status’.
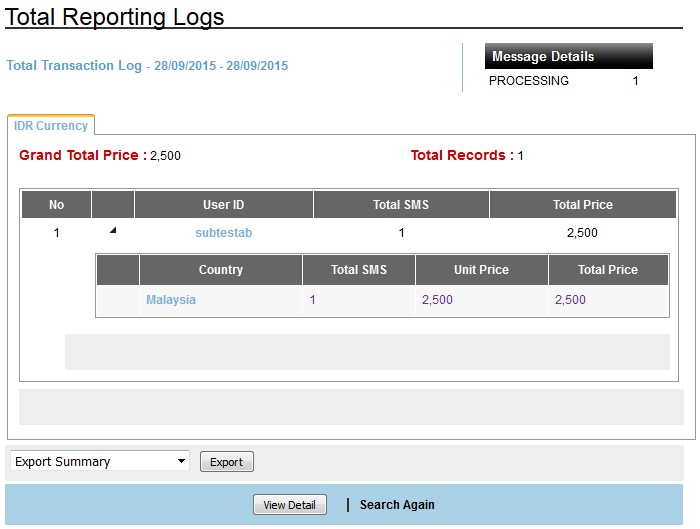
Fig 9.5.1-1
Click the respective ‘User ID’ or ‘View Detail’ to view the details of the user data.
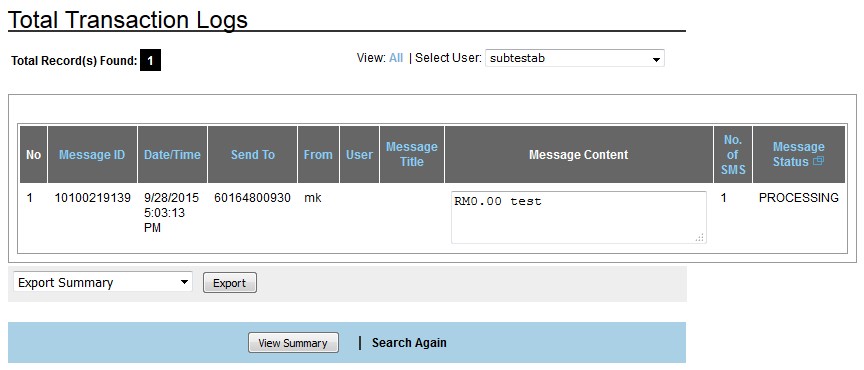
Fig 9.5.1-2
9.5.2 View Summary
When 'View Summary' is clicked, the ‘Total Reporting Logs’ will be displayed again.
9.5.3 Export
- Select ‘Export Summary’ or ‘Export All Details’ from the drop down list.
- User can select to either ‘Open’ or ‘Save’ the file.

Fig 9.5.1-1

